
You've downloaded the perfect brush set, opened Procreate with enthusiasm, and started creating: only to find your strokes behaving erratically, your lines skipping unpredictably, or your entire workflow grinding to a frustrating halt. The truth is, even experienced digital artists frequently overlook critical brush settings that dramatically impact their creative output, and these seemingly minor mistakes can transform what should be an intuitive artistic experience into a technical nightmare.
Understanding how to properly configure and troubleshoot your Procreate brushes isn't just about fixing problems: it's about unlocking the full potential of your digital toolkit and reclaiming the fluid, natural drawing experience you deserve. Let's explore the seven most common brush mistakes that might be sabotaging your artwork right now, along with the precise solutions that will transform your creative process.
1. Your Pressure Curve Settings Are Working Against You
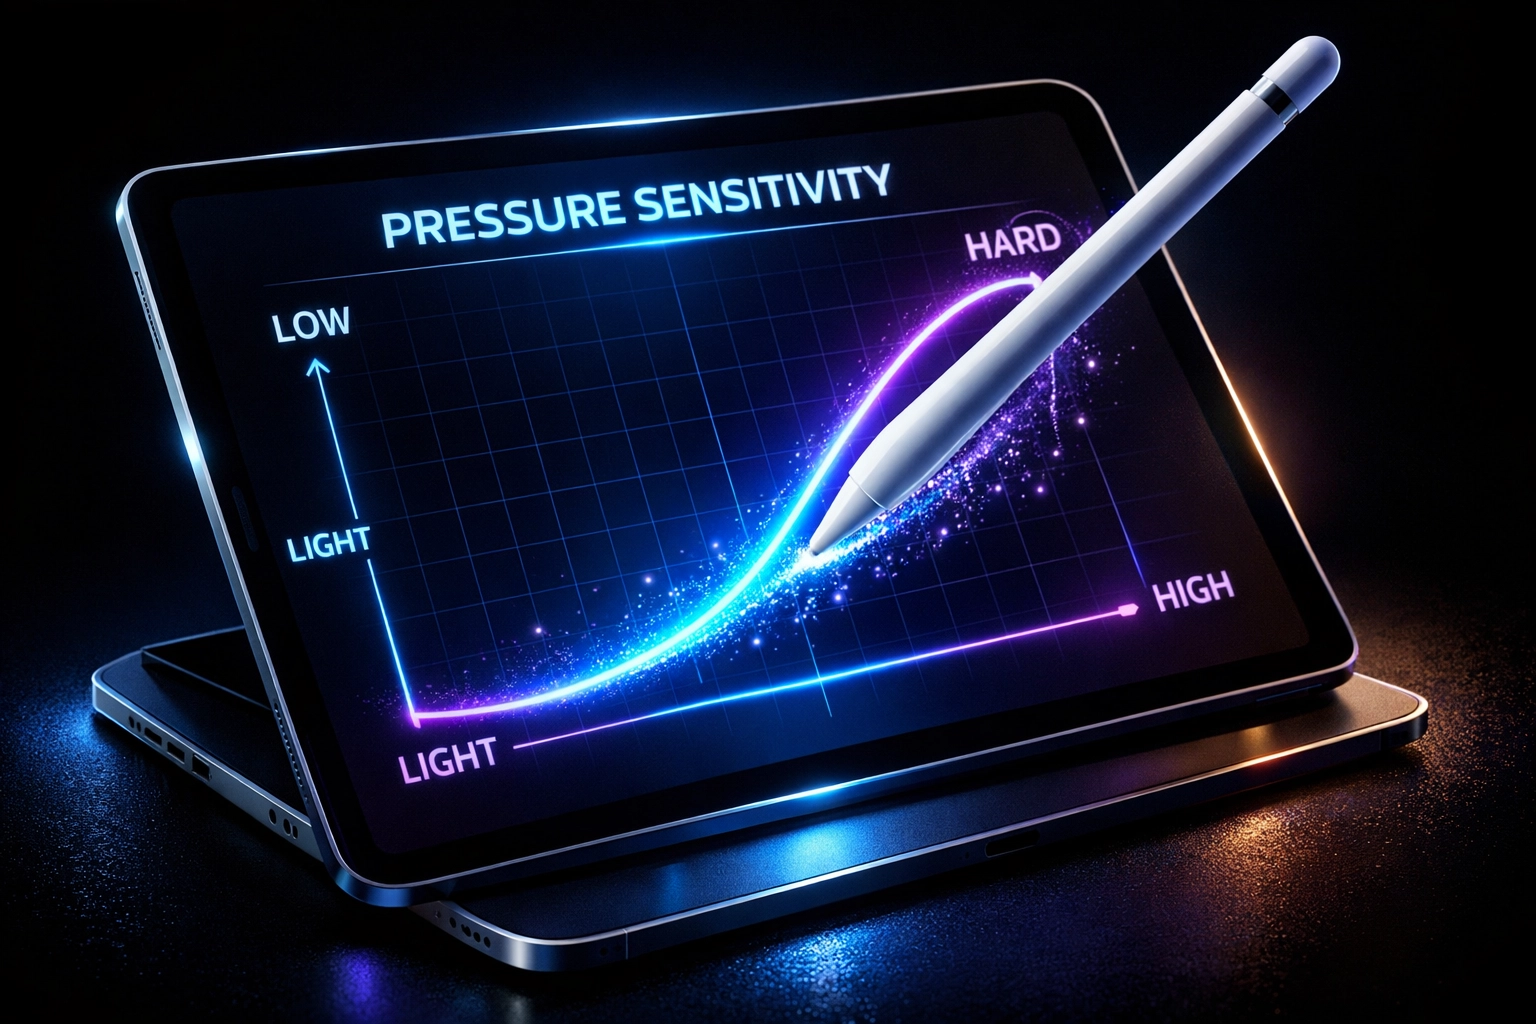
The pressure curve represents one of the most powerful yet frequently misunderstood aspects of brush behavior in Procreate. When your strokes appear either too faint at normal pressure or explosively thick with the slightest touch, your pressure curve configuration is almost certainly the culprit, not your artistic technique.
Access your brush settings by tapping the brush icon, select the problematic brush, and navigate to the pressure curve panel. The curve graph shows how Procreate interprets the pressure from your Apple Pencil: a steeper curve creates more dramatic variations between light and heavy strokes, while a flatter curve produces more consistent results regardless of pressure. Experiment with adjusting this curve until your brush responds naturally to your drawing style: there's no universal "correct" setting, only what feels right for your unique workflow and artistic preferences.
2. Excessive Stabilization Is Strangling Your Natural Strokes
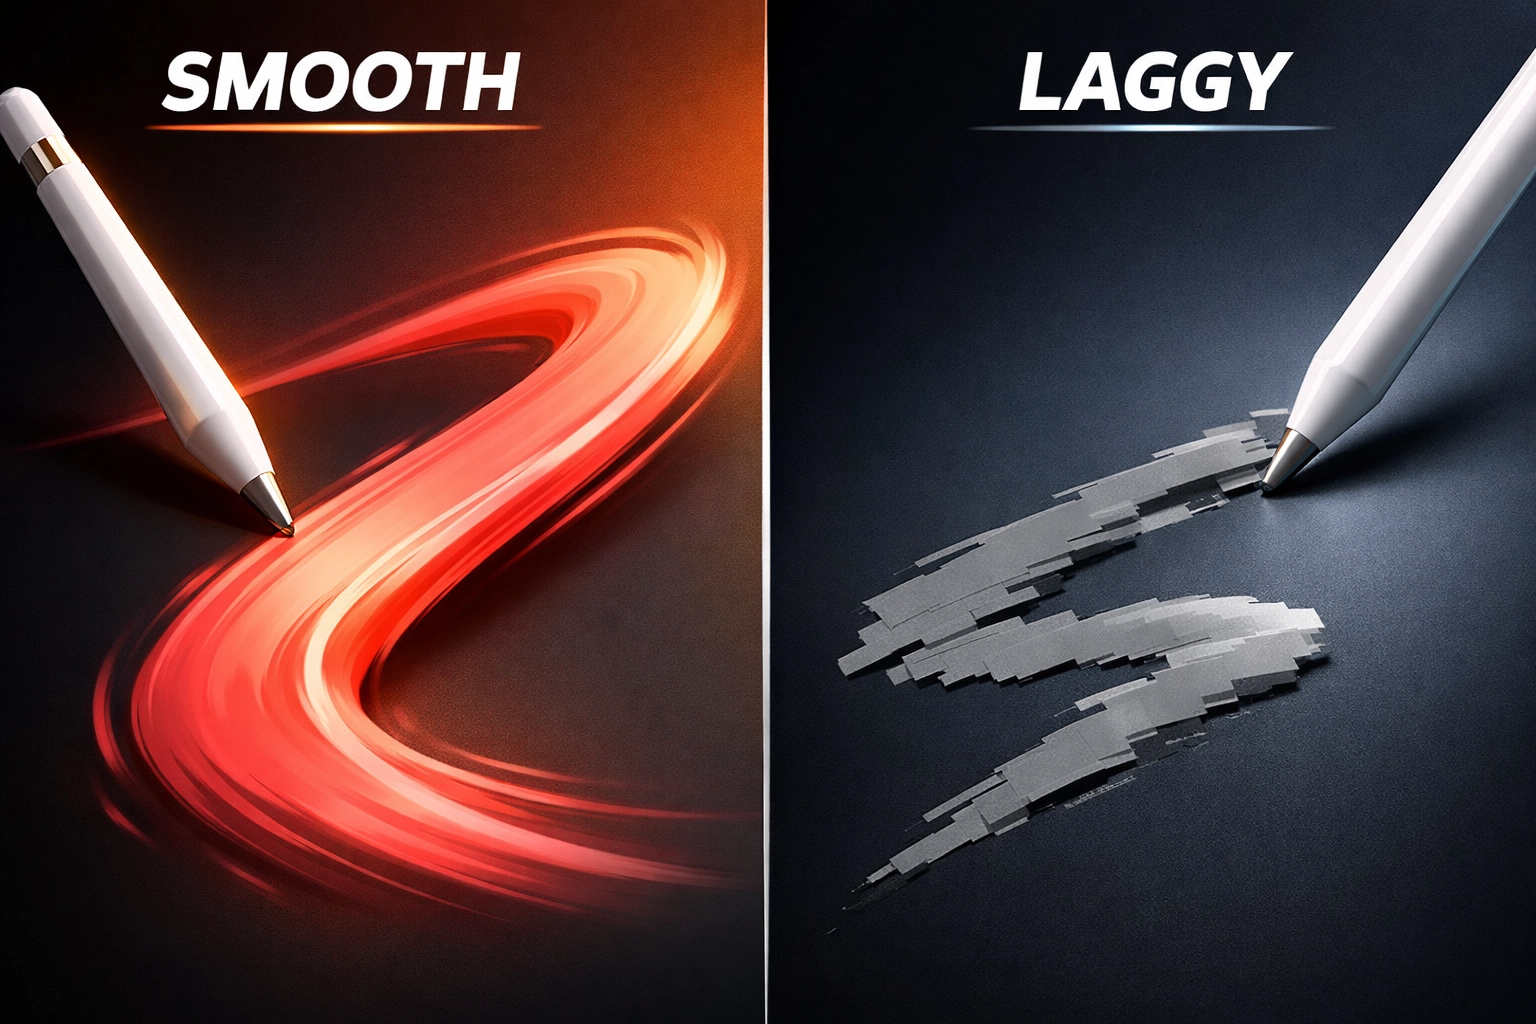
When your brush feels sluggish, unresponsive, or creates an unsettling delay between your stylus movement and the appearance of marks on canvas, you're likely dealing with stabilization settings that are too aggressive. Stabilization exists to smooth out shaky lines and create cleaner curves, but excessive stabilization transforms your brush into something that fights against your natural hand movements rather than enhancing them.
Open your brush settings, locate the stabilization slider within the brush studio, and reduce it significantly: many artists find that settings between 0-30% provide optimal results for most applications. The key is finding the sweet spot where minor hand tremors are smoothed without introducing noticeable lag. Remember that different brush types benefit from different stabilization levels: sketching brushes typically perform better with minimal stabilization, while calligraphy or technical drawing brushes might require slightly higher settings.
3. Dynamic Brush Scaling Isn't Configured for Your Workflow
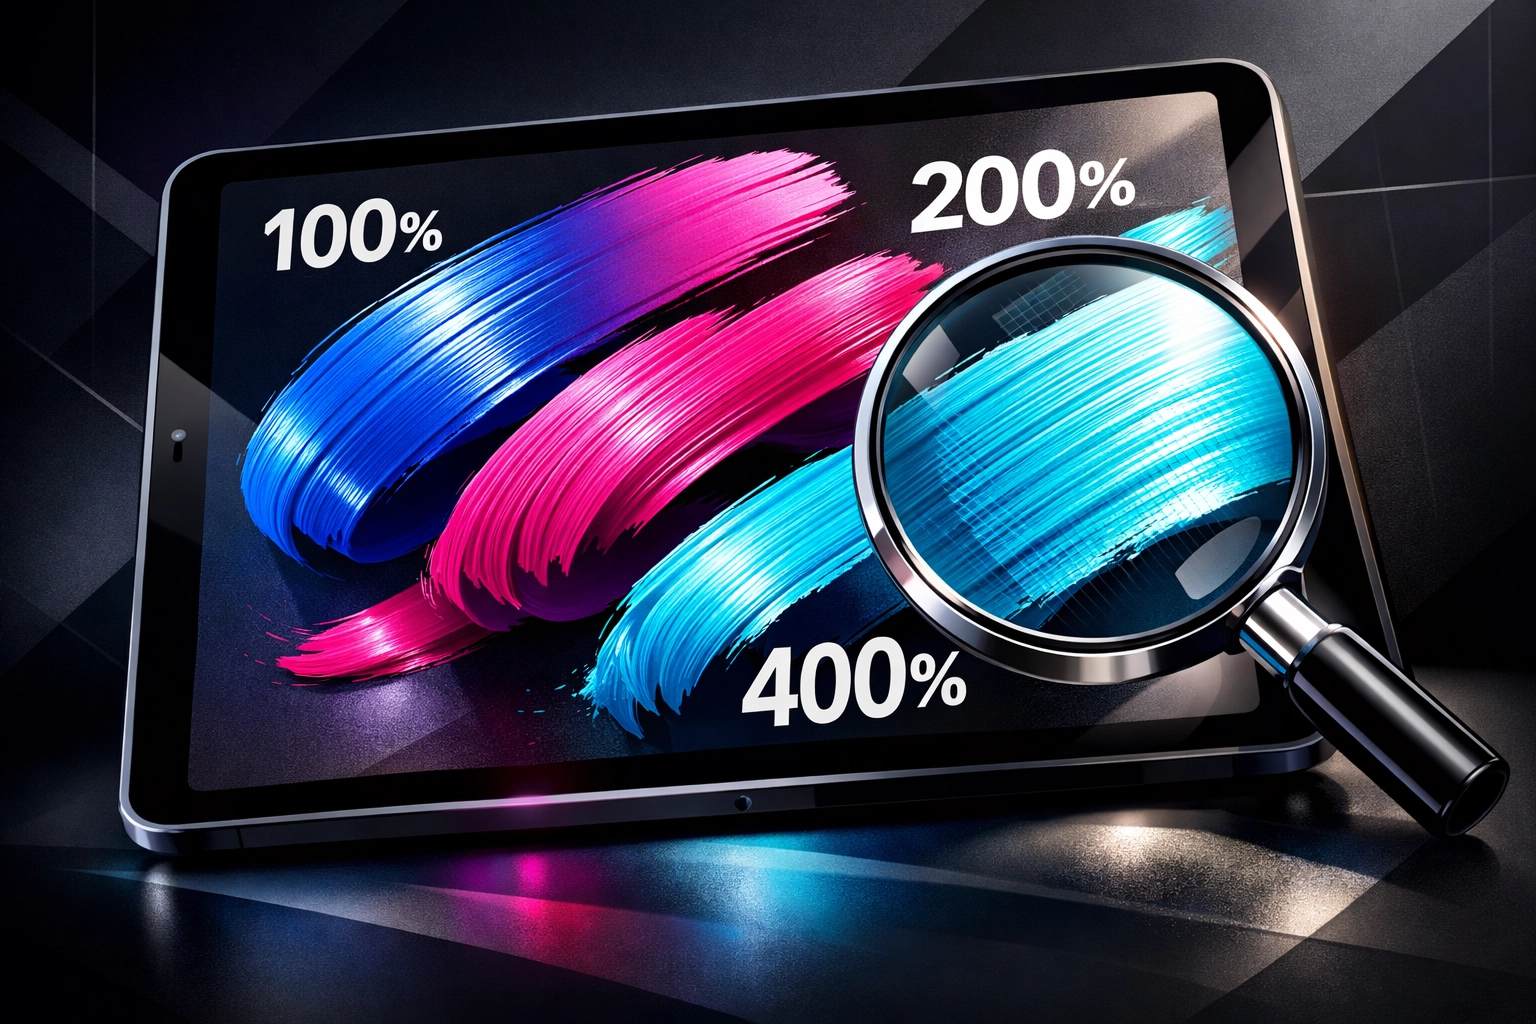
Have you ever zoomed into your canvas only to discover your brush has suddenly shrunk to an unusable size, or zoomed out to find your previously perfect brush now creating comically large strokes? This frustrating inconsistency stems from dynamic brush scaling settings that don't match your working preferences.
Navigate to the wrench icon (Actions menu), select Prefs, then locate the "Brush Cursor" section where you'll find the toggle for "Enable dynamic brush scaling." When this feature is activated, Procreate maintains your brush size relative to your canvas dimensions regardless of zoom level: what appears as a 50-pixel brush at 100% zoom will remain visually consistent when you zoom to 400%. When disabled, the actual pixel size remains constant, meaning the brush appears larger when zoomed out and smaller when zoomed in. Most artists prefer enabling this feature for a more intuitive experience, but understanding both options empowers you to choose what best serves your particular creative process.
4. Unintended Transparency Is Undermining Your Work
You're certain you're using full opacity and pure black, yet your strokes keep appearing translucent and washed out. This maddeningly common issue typically has one of two causes: either your opacity slider has been accidentally adjusted, or you're unknowingly working with a gray color value rather than true black.
First, check the opacity slider on the left side of your screen (or right side if you've configured a left-handed interface): ensure it's positioned at 100%. Next, verify your color selection by tapping the color circle in the upper right corner and examining your color values. In the "Value" slider of your color panel, confirm you're at absolute zero for true black. Even a value of 2-3% will create a dark gray that appears black at first glance but produces semi-transparent strokes that fail to achieve the solid coverage you need. This distinction becomes paramount when layering artwork or creating elements that require complete opacity.
5. Complex Brushes Are Overwhelming Your System Resources
Your brush performs beautifully for the first few strokes, then progressively becomes laggier and less responsive as you continue working. This performance degradation indicates that your brush's complexity is taxing your iPad's processing capabilities, particularly when working on large canvases or using brushes with numerous texture stamps and complex grain settings.
The solution requires a balanced approach: before modifying your beloved brush, duplicate it first so you preserve the original. Then experiment with reducing the grain scale, simplifying texture stamps, or adjusting the streamline settings. Additionally, close unnecessary background applications to free up system memory: your iPad allocates resources across all open apps, and closing unused programs can dramatically improve Procreate's performance. If issues persist with a particular brush, consider whether a simpler brush might achieve 90% of the desired effect with significantly better performance. Sometimes the most professional results come from strategic simplicity rather than complex brush engines.
6. Tilt and Pressure Sensitivity Need Calibration
When your brush creates unexpected gaps, skips entire sections mid-stroke, or produces inconsistent line weights despite steady hand movements, your tilt settings or pressure sensitivity configuration likely requires adjustment. These settings determine how Procreate interprets the angle and pressure of your Apple Pencil, and misconfiguration can transform smooth strokes into unpredictable disasters.
Within your brush settings, examine both the Pressure and Tilt panels. The tilt settings control how the brush responds when you angle your stylus: some brushes naturally incorporate tilt for creating varied stroke widths or textures, but excessive tilt sensitivity can cause unintended behavior. Similarly, overly aggressive pressure settings can create situations where slight variations in pressure cause dramatic, unwanted changes in your stroke appearance. Adjust these settings incrementally, testing after each change until your brush responds predictably to your natural drawing motions. The goal is calibration that feels invisible: where the brush becomes a natural extension of your artistic intent rather than a technical obstacle.
7. Alpha Lock or Clipping Masks Are Secretly Restricting You
You're attempting to add details to your illustration, but your brush refuses to create marks in certain areas, or your strokes mysteriously conform to the boundaries of existing artwork. This bewildering behavior typically indicates that Alpha Lock or Clipping Mask has been unintentionally activated on your current layer, restricting your drawing area to specific regions.
The quickest fix: simply tap two fingers anywhere on your canvas to immediately undo the most recent action if you've just accidentally activated these features. For a more deliberate approach, open your Layers panel, select the problematic layer, and examine the layer options. Alpha Lock will show a checkmark and restricts drawing to only the existing pixels on that layer: perfect for adding shading without going outside the lines, but frustrating when accidentally enabled. Clipping Mask appears as an indented layer in your layer stack and restricts drawing to the layer below it. Deactivate whichever feature is constraining your work, and your brush freedom will be instantly restored.
Elevate Your Procreate Workflow with Professional Resources
Mastering these technical solutions represents just the beginning of your Procreate journey. The true transformation happens when you combine technical knowledge with access to professional-grade brushes and digital assets that expand your creative possibilities exponentially. Beyond troubleshooting individual brush issues, consider investing in comprehensive resources that provide you with diverse, professionally crafted tools designed to work flawlessly from the moment you import them.
The graphic design bundle available at Design Vault delivers an extensive collection of premium digital assets, including brush sets meticulously optimized for performance and versatility. When you work with professionally developed brushes, you eliminate many common technical issues before they arise, allowing you to focus entirely on the creative aspects of your work rather than constant troubleshooting.
Moving Forward with Confidence
Understanding these seven common mistakes and their solutions empowers you to approach your Procreate workflow with newfound confidence and technical mastery. Each of these issues, while frustrating when encountered, offers an opportunity to deepen your understanding of how digital brushes function and how to manipulate their settings to serve your unique artistic vision.
Remember that brush customization is an ongoing journey rather than a destination: as your artistic style evolves and your projects diversify, your brush requirements will naturally shift as well. The skills you've developed through troubleshooting these common issues will serve you throughout your entire creative career, enabling you to quickly diagnose and resolve future technical challenges while maintaining your creative momentum.
Your artistic potential flourishes when technical obstacles no longer stand between your vision and its execution. Master these fundamentals, invest in quality resources, and watch as your Procreate experience transforms from occasionally frustrating to consistently empowering.